
Hello my crafty peeps!
I wanted to make a Easter Basket for last weeks Tea and Crafting and this is my third attempt and finally happy with the outcome. This was orifinally posted on the 11th. I had looked at several on Pinterest and wanted to take the bits I liked from each one as well as throw in a few of mine and Marie's ideas.

Here are the instructions:

Here are the instructions:
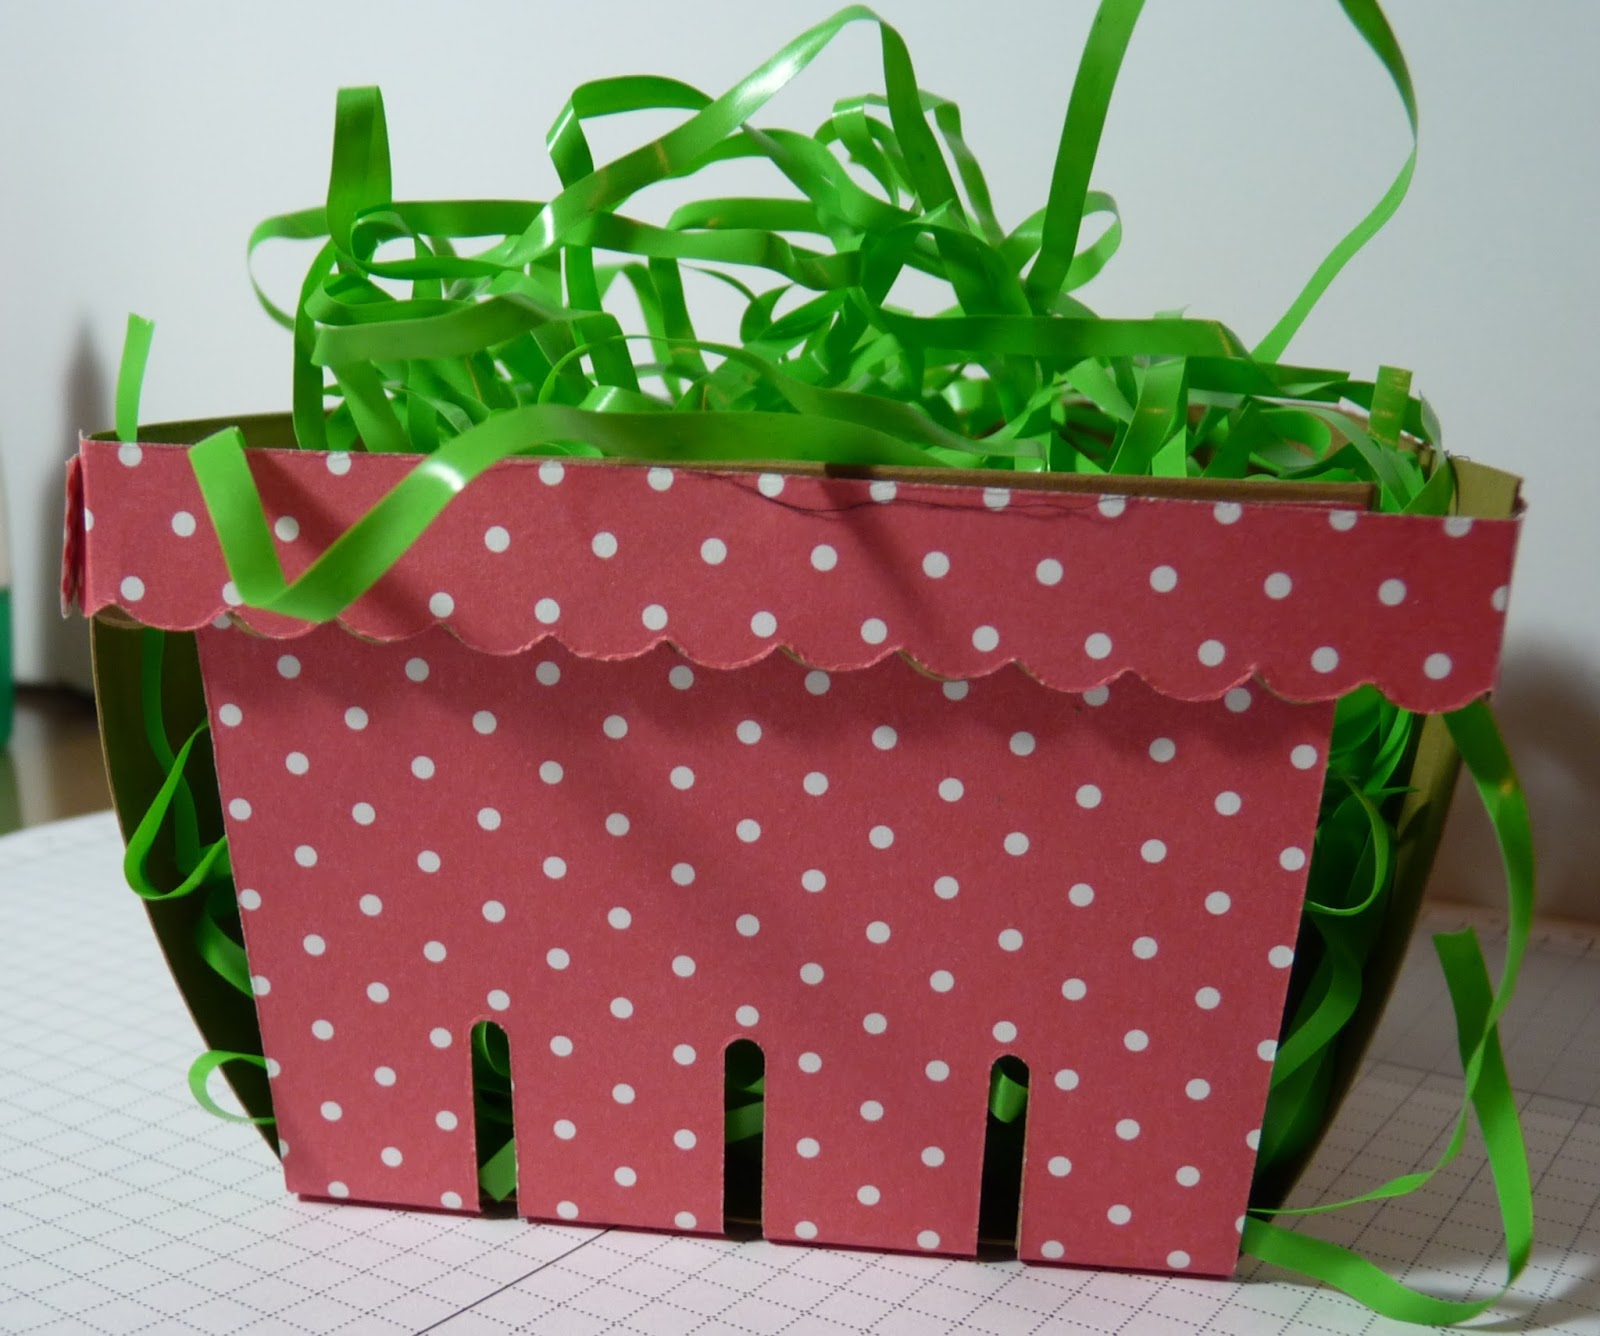
- Cut a 1/2" strip off the long side of an 8-1/2" x 11" piece of Crumb Cake card stock. Save the strip for the handle of the basket. (You can also use the extra strips from the Berry Basket die, but I wanted a longer handle.) Cut the remaining piece of card stock in half to 8" x 5-1/2". This is just big enough for the Berry Basket die. (made in 3 colours Whisper White, Smoky Slate and Crumb Cake)
- Die cut each 8" x 5-1/2" piece of card stock with the Berry Basket die. I cut out one extra piece out of DSP for some contrast. You will use either the scalloped strips or the straight strips for the top edge of the basket; you can use one of the remaining strips as a handle (if you didn't cut the extra strip in Step 1) or set them aside for another project.
- Use the second-smallest oval from the Ovals Collection Framelits dies to cut out three (3) Crumb Cake ovals.
- Use the Sweetheart punch and cut off the bottom to form the mouth/cheeks of the bunny. Pop with Dimensionals
- Use the Itty Bitty Accents punch pack to punch a heart out of Pink Pirouette card stock. Use Glue Dots to adhere the heart to the top of the cheeks. Add two white circles from the Owl Punch for eyes. (I also added small google eyes)
- Use a black marker to draw three whiskers on each side. You can use a ruler or draw them freehand. Also add freckles with the Blushing Bride Stampin' Write marker
- Use the extra-large oval punch to punch out two Crumb Cake ovals and then the large oval punch to cut two Pink Pirouette ovals (we changed and used shimmery pink paper). Glue the smaller ovals onto the larger ones, aligning them near the bottom, to make the ears. I decided to try him in Whisper White and add more dimension to his nose. (Bunny update to below)
- With a bone folder, use a motion similar to curling ribbon to slightly curl up the tops of the ears.
- Glue the ears to the large oval behind the face. Use your own judgement to align for the spacing of the ears; I centered each ear. Punch out one more extra-large oval and adhere vertically to the back of the large oval, to give yourself something to adhere the face to back inside of basket. Once you have attached this take the extra oval from step 3 and adhere to the back to hide where you attached the ears. I used a pink marker for the cheeks.

- With the last second-smallest oval from the Ovals Collection adhere a cotton ball or in my case a fur pom pom to the top portion of the oval for a tail. Then use the extra-large oval punch to punch out two Crumb Cake ovals and then the large oval punch to cut two Pink Pirouette ovals. Glue the smaller ovals onto the larger ones, aligning them in the center for the feet. Attach to the sides of the Oval on either side of the tail.

- Assemble the Berry Basket. I used Tombow Multi liquid glue, but you could also use a strong, permanent tape, such as Sticky Strip, or a mini stapler.

- Punch a 1/16" hole in each end of the handle and near the top of the left and right sides of the basket. (I stapled mine on in the end)
- Use mini silver brads to attach the handle to the basket. If you do not want the handle to be moveable, you can attach it with strong adhesive or a mini stapler instead of using brads.

That's it! I added some green or white Easter grass to my basket that I bought at Dollarama. I will be filling my baskets with a few chocolate eggs.
For heavier items, you could make your baskets with coaster board or chipboard so they are sturdier.
Hope you like it!
Remember throughout Sale-A-Bration with every $60 spent with Stampin' Up! you will earn yourself a FREE product from the SAB Catalogue.
If I can give you just a little inspiration, where you can look at one of my cards and think I can do that, or I could tweak that and put my own spin on it, then I am achieving what I have set out to do!


I have had a great response to these baskets on Facebook 240 likes and several comments. Would love to hear what you think....
ReplyDelete